Showing posts with label Candlemaking. Show all posts

Wednesday, May 25, 2011

RUBBER STAMPED AIR FRESHENERS

RUBBER STAMPED AIR FRESHENERS
A Step-By-Step Tutorial


Always cover your workspace to prevent staining and to simplify cleanup. Here, we have covered it with a sheet of parchment paper.

Gather your materials – air freshener blanks, fragrance oil, rubber stamps, stamp pad(s), coloring materials (colored pencils were used here, but fine-tipped markers also work well), brush to apply fragrance

Start by selecting a blank. Here, we’ve used an oval because it would accommodate the tall, thin tulip stamp we wanted to use.


Choose a rubber stamp that will fit your shape. Be sure that your stamp pad and markers are compatible with the fragrance oil you’ve chosen before starting. Pigment stamp pads that are marked as being permanent for use on fabric generally give excellent results. We’ve chosen to stamp the outline in black, but you can use whatever color you like. Any type of rubber stamp will work, but the clear acrylic cling type is easy to use, because you can see exactly where the stamped image will appear on the shape – no guessing involved like there is with the wood block type.


Carefully ink the stamp, making sure that all raised surfaces are completely inked.


Turn the stamp inked side down, line it up on the air freshener blank, and stamp the blank. Be sure that you don’t move the stamp, to avoid a double impression on the blank.


Remove stamp and allow the stamped image to dry completely. (Tip – if you are making multiple air fresheners with the same stamp, line them up and stamp each one, reinking each time. By the time you stamp the last one, the first one should be dry and ready to color in.) Older kids and teens can also have fun coloring these!


Now use the colored pencils (or markers) to color in the image you’ve just stamped.


Here, we used two shades of green for the stem and leaves and two shades of pink to color the tulip. This took less than a minute to color in.


Punch your hang hole, since it will be more difficult (and messier!) to do it after fragrance is applied.


When selecting fragrance oil, keep in mind that the blank will pick up the color of the fragrance. Here, the pale yellow color of the fragrance oil works well with the pinks and greens – it definitely would not have been as attractive with a brown background! Apply your fragrance with an inexpensive brush or disposable pipette.


Here’s the finished air freshener, ready for a hanger and packaging! Your creativity is limited only by the selection of rubber stamps available, and custom rubber stamps are easy and inexpensive to order online. School or organization logos can be stamped on for fundraising, or stamp with your company logo and give to customers with their orders.

Monday, May 9, 2011

SIMPLE PRIMITIVE AIR FRESHENERS

SIMPLE PRIMITIVE AIR FRESHENERS
A Step-By-Step Tutorial

Always cover your workspace to prevent staining and to simplify cleanup. Here, we have covered it with a sheet of parchment paper.

Gather your materials – air freshener blanks, fragrance oil, liquid candle dye (BC Coffee / Caramel liquid was used here), brush and or a fragrance oil dropper, mixing container

Weigh or measure out your fragrance oil into the mixing container. Here, we used ½ ounce by weight, which will be enough for approximately five air fresheners.


Carefully add liquid candle dye to the fragrance oil. The amount needed will depend on the desired level of color – here, we have added less than a drop by dipping the tip of a metal skewer into the dye and shaking off the excess back into the bottle. This fragrance oil was already a dark color, so very little dye was needed. If your chosen fragrance is clear or lighter colored, you will need more dye. To achieve even a very dark shade, you will not need to add more than 1-2 drops per ounce of fragrance oil. Take careful notes of how much fragrance and color you use, so you can duplicate the exact shade in the future!


Apply the dyed fragrance oil to the air freshener blank. The two easiest and least messy ways to do so are by brushing it on with an inexpensive wide paintbrush, and dotting it on with a fragrance oil dropper. Don’t worry about getting the layer of fragrance perfectly even – the material will distribute the liquid evenly over a period of a few minutes. Most shapes will accept approximately 1/10 of an ounce of liquid, depending on their size, and if you apply more than it will absorb, simply blot the excess with another blank.


Here is the finished air freshener, with fragrance lightly dyed and brushed on. This gives the same basic look as dying them with tea or coffee, but with the convenience and speed of a single step!


A slightly more mottled effect can be achieved by adding more dye, then drizzling it on with a dropper. The fragrance/dye mixture will spread out, but slightly darker patches will remain in the spots where it was applied.


Here is the finished air freshener, after adding more dye and applying with a dropper.


And here is the range of looks you can achieve with this technique – not just on prim shapes, but also on other shapes and using different colors of dye. From left to right, a fresh blank, the lightly dyed and brushed air freshener, and the more deeply dyed and droppered air freshener.


Monday, September 13, 2010

Overdipped Cut-Out Pillars

Overdipped Cut-Out Pillars

Instructor: Doneen St.John


You Will Need:


  • IGI 1343 or IGI 1239 Paraffin Wax
  • Pillar Mold (square or oval works best so you have a flatter surface for the cut-out)
  • Vybar 103
  • Wicking of your choice
  • Candle dye of your choice
  • Fragrance of your choice
  • Pouring Pot
  • Presto pot or double boiler
  • Pliers
  • Cookie Cutter
  • Exacto Knife


You can use IGI 1343 or IGI 1239 for the core pillar with no additives if you want the core mottled. Add Vybar 103 to the wax if you want a more solid opaque core.

Use the same wax with the Vybar for the overdipped layers. Fill your pouring pot or dipping vat with enough wax to dip the height of your pillar.


Hold your pillar tightly by the wick with pliers, and slowly dip it several times until it looks nice and smooth and the layers are thick enough for a cut-out. Perfect dipping temperature will depend on the wax used, but you will get a feel for how well the layers are adhering as you dip, and you can adjust your temp accordingly.


Then when the layers are still semi-soft, press your cutter shape into the front while carefully holding the back of the candle, and push slowly until you feel it hit the core. Use an exacto knife to peel out the shape, it should be easy to remove. If you use a light color for the core and a dark color for the overdip, the shape will glow when it burns!


These can also be made with grubby whipped wax for the overdip for a more primitive looking cut-out pillar. Add spices or coffee grounds to the whipped wax for an extra grubby look!

Thursday, August 13, 2009

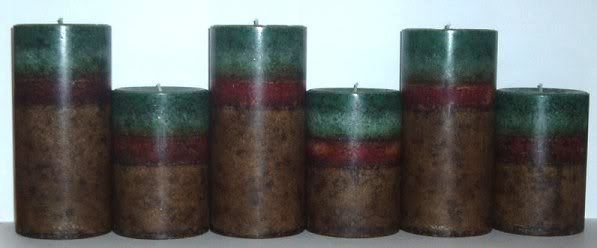
How to make Rustic Layered Pillar Candles!


Photobucket


Pillar Candles are all the rage from Primitive to Contemporary! Here you will learn how to create that beautiful one of a kind look that a mottled layer pillar candle gives!

For this project you will need the following: IGI 1302B Mottle Blend from BCN for these candles. I used a 2/0 square braid wick, Mold Plugs, Mold Sealer Putty, Wick Rods, 3"x4" Seamless Aluminum Pillar Molds, 3"x6" Seamless Aluminum Pillar Molds, Cedar & Saffron Fragrance, and dye chips in Autumn Orange blended with Brown Color Block, Hunters Green Dye Chips and Brown Color Block.

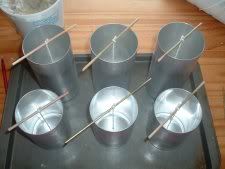
First, pre-wick your molds by threading the wicking through the bottom hole in the mold. Tie the wicking off to a wick rod across the top of the mold. Pull the wick tight and place a mold plug into the hole along side the wick, taking care to be sure the wick is tight! Seal the bottom of the mold area around the plug and over it with the mold sealer putty.


Photobucket


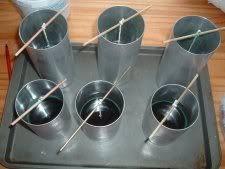
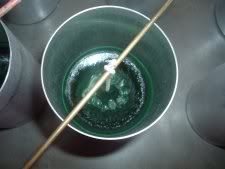
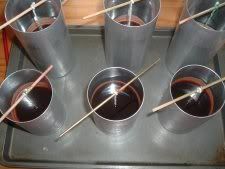
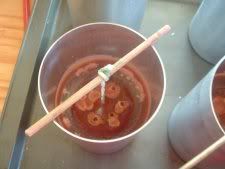
After your molds are ready, melt your wax. Heat the wax to 185, add your dye, then fragrance (I used .7 weight oz of fragrance per lb of wax for this particular scent and candle). Allow the wax to cool down to about 165 and pour into room temp molds. After your first layer is in the mold, swish the wax gently in the mold to bring it slightly up the side as shown below. Allow the wax to cool a bit, and poke relief holes around the wick. I use bamboo skewers for this.


Photobucket
Photobucket


Repeat the process above for your next layer.


Photobucket
Photobucket


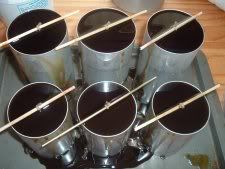
For the third layer, repeat the same process as for the first layer, except completely fill the mold.

PhotobucketPhotobucket


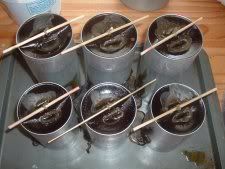
After you have poured the final layer and poked the relief holes, you will need to do a final layer or two. Repeat the process of poking relief holes with each subsequent layer. Do the final repours at 185*.

Have fun with making layered pillars. They are beautiful candles that draw a lot if interest!


Happy Candlemaking!


Flicker