Friday, December 30, 2016

Palm Wax Melts

*Palm Wax Melts*


    As I was rummaging through my large wicker basket of wax melts, I was determined to find that perfect "scent of the day" to use in my new melt warmer. Before I knew it, a growing pile of plain colored, boring, half-full clam shell molds (most with a few wax chunks left over from prior use), covered my kitchen table. I thought "I wish these could be more exciting". Or maybe at least a bit more appealing to the eye before they are actually used. 

With farmer's markets and craft shows coming up with the start of a new year, I thought these would be a perfect item to keep in mind!


So I figured I'd give them a try for the first time :)


Materials you will need:
*Clear Cello Bags (I found the 5x7" size to be perfect)
*Candle Dye (I used the Liquid Dyes, and a few Mica Powder dyes)
*Embed Mold (I used the Turtle mold)
*Glass measuring cup (for easy pouring)


As always, start by melting your palm wax.
While you're waiting for the wax, you can start gathering your twist ties and cello bags. This project goes rather quickly, so you'll be able to put your finished melts into the cello bags in about 15 minutes from when you start making them.


Once your wax has reached the appropriate temperature, go ahead and add your fragrance and coloring. For adding fragrance, I follow the same usage guidelines as when I'm making candles, and I've found it to work well. For a few of the colors, I used a very small amount of mica powder.


*Keep in mind that if you use too much mica, that the excess mica will sink to the bottom of the mold


The palm wax needs to be poured at a hotter temperature, to bring out the crystal-like designs. I poured my wax at 205* into room-temp plastic molds.


*Note: When using the Embed Molds, these molds are rather thick, so you can pour the wax a bit hotter that you would need to for a clam shell mold.


These melts cool rather quickly in these small molds. The melts will cool within just a few minutes at room temperature and will pop out of the mold with no effort.


Soon, you'll have a quickly growing supply of adorable wax melts!


Purple Turtles


 Blue Turtles


Green Turtles


Once the melts are 100% cooled, now you can start putting them in cello bags.


There are so many possibilities for what designs you can make your melts in. From turtles, to alligators, and everything in between! Bitter Creek offers a large selection of molds to jazz up those plain wax melts!


Some claim that the palm wax melts are so appealing, that their sales have undoubtedly boosted, due to the beautiful color contrast that the palm wax offers.

Try putting your melts ahead of the rest and give them a try at your next craft show or farmer's market!


If there is ever a fun candle or Bath & Body product that you would like seen made, we would love to hear from you!
Please send your requests to info@candlesupply.com. :)
Happy Candle & Soap Making!
-Elya


Wednesday, November 30, 2016

Jelly Soap!

*Jelly Soap*

100% Fun & Kid approved!
 
 I was recently asked about this new creation called "Jelly Soap". Having never even heard about this soap prior, I was immediately intrigued and was really eager to try it out. Over the past few weeks, it seems that these new Jelly Soaps have been one of the main topics lately, and have taken over the internet by storm.

I found dozens upon dozens of new recipes out there, which I tested many of; trying to come up with the perfect bar with a wiggly jelly-like consistency, yet firm enough to where it would hold up a bit to typical handling. I wanted to keep the recipe as easy as possible, so I could make it with simple items that I already had at home (making it a perfect fun project with the kids on a rainy day). My main goal was to stick with a recipe that requires plain gelatin, instead of other recipes that require actual jelly base that you can find online. After trying several different recipes, I found the perfect one!

Sooo... here we go :)


Materials you will need:

*1/2c. Boiling Water
*2 packets Original Unflavored Gelatin
*1/4c. Liquid Soap (This can be Hand Soap, Body Wash, Shampoo, etc.)
*Soap Dye (This can be food coloring, Bath & Body Dye, etc.)
* Jelly Soap Molds (You can use a plastic cup, regular soap mold, etc.)
*Bowl and stirring utensil 
*Rubbing alcohol in a spray bottle (optional for removing bubbles)

***


 Start off by emptying the 2 packets of Unflavored Gelatin into a bowl. 


Add a 1/2c. boiling water to 2 packets of Original Unflavored Gelatin.


  Stir until completely dissolved. It was rather lumpy at first, so I switched from a plastic spoon, to a wire whisk, and the whisk worked much better for mixing more thoroughly. Whichever mixing tool you use, be patient with this step to prevent hard lumps! 

You'll notice that a layer of foam will form on the surface. If you don't want bubbles, they are fairly easy to scoop right off with a spoon. It's be best to wait until there is no further mixing to be done, since more bubbles are to come with the next steps.


 Once the Gelatin is completely dissolved in the hot water, pick out your favorite liquid soap. This can be Hand Soap, Body Wash, Bubble Bath, the sky is the limit! I knew my 5 year old would have a blast with these in the bath, so I used a Watermelon scented kids tear-free Shampoo/Conditioner that I had on-hand.

***Note: This Watermelon scent smells A-MA-ZING!!! 
I'd highly suggest making a larger batch, to prevent an upset child once they find out that 
you've used all of their Jelly Soap for yourself. LOL


Measure out 1/4c. of the liquid soap and add it to the Gelatin mixture. After stirring until completely dissolved, the mixture will be notably thicker. Now is the time to add the Soap Coloring of your choice. You can use food coloring, bath & body dye, or even glitter for some extra sparkle! 


For this recipe, I used Grass Green gel tone colorant, as well as Neon Blue gel tone colorant. Bitter Creek has an entire line of Gel Tone Colorants. From Neon, to Metallic, you're bound to find the color you are looking for!


Purely Purple Gel Tone (Just one of many color options)


In a prior batch, I had used Pearl Pink Mica Powder, which colored the Jelly beautifully, but much of the mica powder sank to the bottom of the mold. It was still beautiful though. :)


Once you've mixed your coloring in, gather your Jelly Molds. You can use anything from plastic cups, Regular Soap Molds, or even an ice cube tray to make mini soaps! Bitter Creek offers these 3oz Oval Plastic Cups, so being the perfect size for soap, I picked up some to try. They worked perfectly!


To make it even more fun for kids, try adding some fun items within the soap bar. I picked up these fluffy Metallic Tinsel Puff Balls from a craft store a while back, and they worked great for this project.


 As soon as your molds are all set to go, start pouring! I made half of the soaps with the puff balls, and half without. They were pretty fun. :)


The one thing I did notice about using the puff balls, is that they do float a bit at first, but once your mold is completely filled, pushing them down a bit with a toothpick really helped keep them under the surface. 

If you are really not wanting any bubbles on the surface of your soap (pictured below), using rubbing alcohol in a spray bottle will remove all bubbles right away.


Since these 3oz Oval Cups also come with lids, I put the lids on all of the molds before I put them in the fridge. This also helped keep the puff balls from floating up. 


Now the soaps are all ready to go into the fridge! Depending on how thick you make your soap bars, it may take as little as 1hr before they are ready to remove, but I left my soap bars in the fridge over night to make extra sure that they were good to go. 


 After your soap bars have set, pop them out of the molds and enjoy! 


 *Note: With this recipe requiring Gelatin, these soap bars need to be kept in the fridge. They are one-time use soap bars if used in the bath, since they will dissolve slowly in warm/hot water. 

***

My 5 year old absolutely loved them and kept begging to take baths all day long lol. I am really glad this topic was brought up to me, and that it's actually a completely safe and fun project that the kids can join in and help with. I'm sure we will be making these Jelly Soaps often!


If there is ever a fun candle or Bath & Body product that you would like seen made,
Please send your requests to info@candlesupply.com. :)
Happy Candle & Soap Making!
-Elya


Monday, October 31, 2016

Layered Paraffin Christmas Pillars

Layered Paraffin Christmas Pillars!

Pillar Candles are a great item to have on-hand for the holiday season. Everyone is out looking for that perfect gift for that special someone. What better gift to give, than a memorable piece of home decor that will add a cherished holiday ambience to any household!


This month I wanted to make a set of slanted layered pillars for more of a rustic look. Let's get started!


Materials you will need:

*Pillar Wax (I used the IGI 1343 straight paraffin)


First thing's first... start by melting your wax


As you are waiting for the wax to reach its desired temperature, (For the IGI 1343, this would be 190-200*), gather your candle molds, fragrance, dye, and candle wick.


Start prepping your candle molds by inserting the wick, and sealing off the mold's wick hole around the wick. There are a variety of tools that will help prevent wax spillage from the bottom of the mold as the hot wax is poured in. A couple ways include Mold Sealer Putty, as well as Mold Plugs


Quick Tip: Whenever I make pillar molds, I always like to keep each mold on a paper plate, just in case of an accidental spill from the bottom of the mold, it makes for a much easier clean-up. 


Once your wax has reached its desired temperature, measure out your wax, then add your fragrance and candle dye
*Since the first layer that you will pour, will be the top of the finished pillar candle, I kept this layer white. I only added fragrance to this layer, and I did not use any candle dye.


Melted wax & fragrance mixture


While pouring the first layer, keep the candle mold upright straight, then after all wax for the first layer has been poured, then use a container (I used a cereal bowl) to prop up the mold as you tilt the entire mold to one side.


First layer of wax on a flat surface


First layer of wax after propped up slanted using a bowl


Candle Mold propped up slanted using a bowl


If you want to achieve nice even layers without any color blending from one layer to the next, you will want to wait until the first layer is hard enough so it is completely cooled and solidified. 


 Solidifying first layer of wax

Solidifying first layer of wax


Since I was going for a more rustic look, I poured the second layer once there was a fairly thick surface of solidified wax on the first layer, but while the center was still warm, so the layers would blend a bit. Be sure to pour the next layer 10* hotter than the first layer, to ensure that the layers stick together. If the next layer is poured too cool, the layers will likely break apart.


Second layer of hot Red Wax


Second layer of Cooled Solidified Red Wax


Repeat this process for every layer you plan on making. The final affects will drastically change, based on the temperature at which you pour all of your layers at. After pouring a few candles with the IGI 1343, you will be able to get a good sense of what temperatures will effect the the candle a certain way. For a smoother candle, you will want to pour at a warmer temperature into a heated mold around 185-195*. For a non-smooth primitive looking candle, you will want to pour a bit cooler into a non-heated mold around 165*. 


Pouring 3rd layer of hot Green Wax


3rd layer of hot Green Wax


Now for the fun part! 
After pouring your very last layer, wait until the wax has completely cooled and solidified. Snip the wick off at the base. 


Completely cooled and solidified pillar w/ clipped wick at the base


Flip the candle mold and watch the candle glide right out of the mold. Careful so you don't drop it!!! 


Finished layered pillar candle


Note: With some paraffin waxes, using a mold release agent is recommended, however I have never found difficulty with removing a fully cooled pillar while using the IGI 1343. Just one more of the benefits of using this great paraffin wax!


The possibilities are endless with layering pillar candles! From Candy Cane stripes, to White "Snow Top" Palm Wax Pillars, have fun while bringing out your creative side! 
After all, 'Tis the season!


I hope this project has given you a new idea to try out for the holiday season! 
If there is ever a fun candle or Bath & Body product that you would like seen made,
Please send your requests to info@candlesupply.com. :)
Happy Candle & Soap Making!
-Elya


Friday, September 30, 2016

Autumn Apothecary Jars!

Autumn Apothecary Jars!

Apothecary Jar Candles are a great item to have on-hand for any time of year, with their endless potential. Customize them for the season, or add a personal touch to give as a memorable gift!

 
So here we go!

Materials you will need:

*Container wax (I used the  EZ ParaSoy)
*Fragrance (I used Autumn Leaves BNL for the green, and Candy Corn for the orange)
*Candle Dye (I used the Hunter/Moss and the Pumpkin/Spice Liquid Candle Dyes)
* Apothecary Jar ( used the 12oz)
*Filling for the Bubble Lid (I used leaves and dried corn) 


First, start by melting your wax to 180*-195*. 


While waiting for the wax to reach its desired temperature, make sure you have an open work space with everything you need within arms' reach. We have a selection of Apothecary Jars to choose from, however for this blog, I chose to use the 12oz size. 


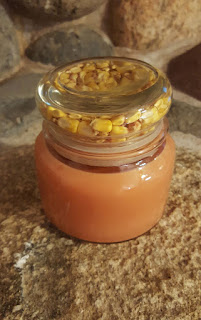
 12oz Apothecary Jar w/ Bubble Lid


When choosing the filling for the Bubble Lid, branch out and be creative! Whether it's candies or tinsel for the holidays, these are going to be so pretty! Being fall time here in the north, I gathered a few colorful leaves from outside as well as some dried corn. It's no wonder why this is my favorite time of year! Talk about beautiful!


Leaves for the Bubble Lid filling


Go ahead and fill the Bubble Lid with the filling that you have collected. The Bubble Lids have a soft plastic cover, so the filling won't drop out. It's sometimes handy to use a butter knife to remove the plastic cover, to fill the Bubble Lid, but not necessary. This is my favorite step of this project :) 


 Bubble Lid with open cover


Filling the Bubble Lid
Filled Bubble Lid


Filled Bubble Lids


 It's always handy to attach the wicks to your jars ahead of time before the wax is ready as well!


Wick secured with a Wick Stickum


By now, your wax should be ready. If the wax has reached the temperature of 180*-195*,  go ahead and add your choice of candle dye and fragrance. Be sure to blend well! This wax should be poured between 165*-180* for optimal results. 

 
Pouring EzParaSoy wax


Instead of adhering to the jars, this wax will actually pull completely away, leaving a smooth finish around the entire candle. However this wax will most likely need a slight top-off. 


Smooth candle surface without second pour


Once your candle has completely cooled, trim the wick, and replace the Bubble Lid as the final step!


These Apothecary Jar Candles are simple to make, and look fabulous on a shelf or corner table! 
The possibilities are endless!


The finished product!


I hope this has given a few of you some new ideas to try out for the upcoming holiday season! 
If there is ever a fun candle or Bath & Body product that you would like seen made,
Please send your requests to info@candlesupply.com. :)

Happy Candle & Soap Making!
-Elya